The last thing you want to be concerned about is the wig falling off your head or being uncomfortable when you walk out the door to show off your new look or costume, right?
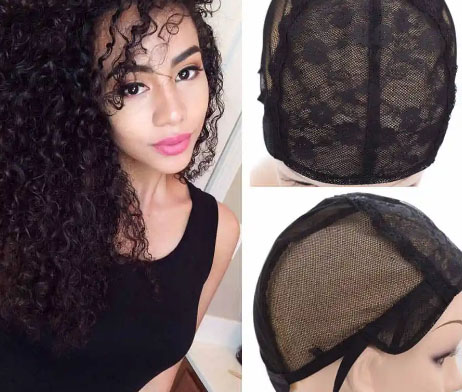
The most crucial piece of equipment you require is a wig cap or wig liner to hold back your hair and safeguard your wig. If wig caps are too tight, you can stretch them on the wig head. They can be made of fishnet or pantyhose material. A tail comb, hair gel, bobby pins or hairpins, and a little hairspray, and these items are also required.
What Is A Wig Cap
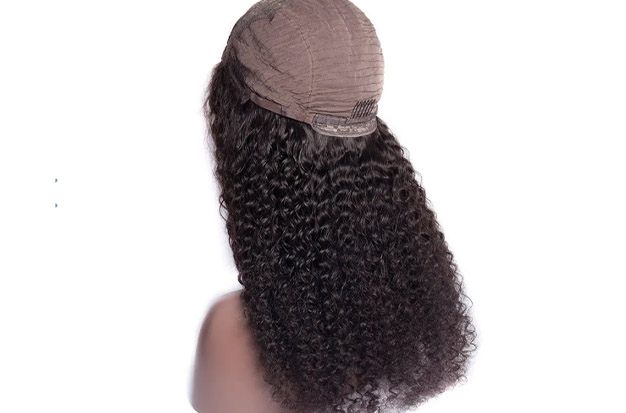
The foundation of a wig is called a “wig cap,” which is built similarly to a baseball cap to mimic the shape of the head. Wigs start with wig caps, to which the hair and style are attached. The terms lace front, capless, hand-tied, and monofilament may have come up in conversation, but what do they all mean? To help you choose the options that best meet your needs, we’ve provided an overview of wig cap constructions along with the benefits and drawbacks of each type.
How To Put On A Wig Cap
Step 1: Put Your Hair Up If Needed
There is a persistent argument in the wig community about whether wig caps should be worn or not, which can be confusing for beginners. There are a few situations where wearing a wig calls for the use of a wig cap, typically when someone has very little to no hair because it helps to secure the wig. If you have a sensitive scalp, we would also advise wearing a wig cap since it adds a layer of protection between your head and the wig and helps to prevent itching. We always advise wearing a wig cap to see if that improves your overall comfort with your wig.
Step 2: Put On A Wig Cap
Due to their very subtle hairlines, which enable styles to be worn away from the face and produce a more natural look, lace front wigs are a popular option. If the lace front wig is uncut, the application procedure only changes slightly.
However, there are additional precautions to take if you’re putting on a lace front wig for the first time to prevent damaging the monofilament fabric at the front of the wig cap while you’re fitting your wig. When securing your wig, try to avoid bending or folding the hairline and avoiding stretching the monofilament lace at the front, as these are both very delicate areas.
Stretching the wig cap back over your head while maintaining contact with the front of your hairline. Then brush your hair from front to back under the cap. Depending on what feels most comfortable for you, you can tuck all of the hair on the sides and back underneath using a rat tail comb or your fingers. If your wig cap has open ends, you can simply fold the top portion inward. Make sure your wig cap is always at the level of your natural hairline.
Step 3: Put On A Wig
It’s time to put on a wig after you’ve secured your wig cap. The front edge of your wig base should be next to the front edge of your wig cap when you are wearing your wig. From front to back, gently put on your wig. When putting on lace pieces, you need to be extremely gentle. Make sure your piece sits directly at the hairline where it naturally grows, and make sure the lace is not tucked under.
Step 4: Adjust Our Wig
It’s time to conceal your hair now that it’s up! Pull the wig cap over your head, into your face, and back up again so that it touches the hairline. You can then comb the cap to remove any stray hairs. Before applying makeup, I do this.
Your wig’s back should fit snugly against your neck’s nape, just below the occipital bone. The back of your wig will fall into the proper position when you place it on, so don’t pull it down too far. Find a position where the back of the wig is most comfortable. If the nape piece is too far down, your wig will move when you move.
Step 5: Secure Your Wig As Needed
Whatever type of hair you have, you should always aim to have it flat against the back of your head, where the wig is stretchy and can accommodate the additional volume. Unless you are wearing an extra-large wig, avoid lumps and try to avoid adding thickness to the front or side of your head (by braiding your hair, for instance).
If you feel the need to secure your wig after applying it, use a few bobby pins to fasten the sides. To keep your wig in place, make sure the foundation is pinned to the wig cap and that the bobby pins are hidden. For both those with and without hair, this application works the same.
Do You Need A Wig Cap?
A wig cap provides a layer of friction against the wig, helping it to grip and making it particularly beneficial for ladies with total hair loss. Some people find comfort in knowing their beautiful wig will stay in place all day long thanks to a wig cap.
Wig caps offer an additional layer of comfort between the wig and your head for women with delicate skin and scalps. Wigs can cause sensitive skin to feel itchy and irritated. A wig cap can make wigs feel much more comfortable for women who have lost all of their hair.
Under wigs, sweat and oil can accumulate throughout the day. Your wig may move if it is applied to your head directly with no barrier separating it from the oils on your head. Underneath the rest of your makeup, wig caps function as a foundation base layer: they create a smooth, even surface for what goes on top of it and guarantee that everything will stay firmly in place.